Since using Unity, I’ve been trying to replicate a pipeline that’s similar to Flash. Being able to use Flash’s environment for hand-polished 2d animation just can’t be beat, unless you count custom developed tools. LWF from GREE shows promise in allowing you to bring your Flash animation into Unity, but there is some work involved in getting it to work!
With the mobile version of DONUT GET!, I tried a homemade Sprite Animation approach. This worked reasonably for the requirements of the port but it was more trouble than anticipated given the size of the texture sheets needed for so many frames of animation. Sprite sheets ate up RAM like nobody’s business and easily crashed lower-end devices.
Late last year GREE announced a godsend, LWF. It’s an Open Source tool to export Flash animation from SWF’s into Unity or HTML5. This was around the time I released DONUT GET! on mobile (which was GREE integrated) and I was excited to try it out. Unfortunately, the first release required you to compile it yourself and the only info I could find was in Japanese. Later on I found out that GREE posted more information and a super helpful video walkthrough on the Unity forums. Continue Reading…
Shortly after I posted my tutorial on creating a Starfield with Away 3D Lite I tried to see how much I could improve performance with Away 3D 4.0, which was Flash 11 and in Beta stage at the time. I got caught up with finishing Donut Get! and working on Unity stuff and forgot about making a post about the demo. Here’s a post about that Away 3D 4.0 demo I made.
This was inspired by playing Kid Icarus on 3DS. During the flying segments, you’re always flying through clouds which is a great effect. I think they do something similar to this, where the clouds are 3d slices of a cloud which you pass through.
I created the clouds with noise. To get “3D slices” I used a 3d Perlin noise generator by Ron Valstar. The regular Flash noise class lets you generate noise on X and Y axis, this allows you to move in the Z axis to create slices.
I used Sprite3Ds for the cloud slices, hoping that that would allow me to use a greater amount of cloud slices. In this demo I’m using 12 separate Sprite3D instances. It takes a while to generate the noise at the beginning, I don’t think this noise generator anywhere near as fast as Flash’s internal one unfortunately. I spent a long ass time adjusting the Generator and settled on this result which I felt was looking pretty good, rather than just settling for something that was fast to generate.
Sprite3D displays like a billboard/plane in 3D space that is always pointed towards the camera. The problem with Sprite3D is that it’s displayed as a point in space, and if the point isn’t within the camera viewport, it doesn’t display at all. You can see this issue as you rotate the camera to the side. I tried a list minute fix to change it to planes but I couldn’t get the planes to display. It may have something to do with the scale of the scene, the slices are like 15,000 width. Not spending any time trying to figure it out so good luck with it if you wanna try! Continue Reading…
This is a tutorial based on the simple starfield I created during the loading screen for our recently released game, Rush Hour Plus. I created it in Flash with Away 3D Lite.
This can make a good effect for flying through stars in space, cool particles for action sequences, pixies in an enchanted forest, lotta different things if you put your mind to it!
Here’s the starfield used for the loading screen for Rush Hour Plus .
I wanted to give a little motion to the loading screen with adding too much weight to the filesize (only like 30KB) so I opted for creating this starfield with Away 3D Lite.
Download Away 3D Lite from their repository. Their site has an old version which doesn’t include the Sprite3D class. Get it latest version here:
overrideprotectedfunction onInit():void { trace("on init");
debug = false;// setting to false hides debug info in template class
//create bitmapData for our material, 4x4 and white! (0xffffff)
starArt = newBitmapData(4,4,false,0xFFFFFF);
// create an Away3D Material with that bitmapData, this is the image used for our particles!
//var starMaterial:BitmapMaterial = new BitmapMaterial(new starArt().bitmapData); // use this if you decide to import an asset var starMaterial:BitmapMaterial = new BitmapMaterial(starArt);
// create a Vector array to the size of "starCount"
stars = new Vector.(starCount ,true);
// start filling the Vector with Sprite3D objects! for(var i:int = 0; i < starCount; i++){
var star:Sprite3D = new Sprite3D();
star.material = starMaterial;
star.width = 4;
star.height = 4;
star.alignmentType = AlignmentType.VIEWPOINT;// I forgot what this does... haha! look it up!
The class uses the Away3D BasicTemplate class, which sets up the view and basic scene super quickly. I believe there’s also a FastTemplate class, but for some reason it doesn’t work with Sprite3Ds so watch out for that! And by default the BasicTemplate has a debug function built in, so you have to switch it off. The BasicTemplate is good for setting up something quick! But I’d rather setup something myself ideally.
It creates 200 Sprite3D objects, which use a white 4×4 square of BitmapData for its texture. Those are then scattered randomly in 3D space and on each frame it pushes them forward 20 units. I added in some keyboard controls so you can mess around with it (arrows and WASD).
The source can be run from an FLA (CS4 format and AS3) or you can execute it as a Flex Actionscript Project (just make sure to include the lib folder as source, and swc folder).
I hope this helps!
Away3D is a huge improvement over Papervision. I still haven’t done any animated character demos with it but we’ll see if I ever get around to it!
——–
For code styling, I’m using the CodeColorer plugin. Very nifty!
I was looking into XML Tile Map editors a while ago and I found Tiled Map Editor. The site looked nice and was recently updated so I thought it looked like a good one to try. I recognized the demo maps displayed in the editor screenshots, they were from The Mana World. I contributed a few tiles to the project back in 2004, about midway through my journey through college.
During that time I was trying to figure out how I was going to be able to make games for a living. Although I was developing games like Thugjacker in my free time, I never believed there was a career in doing Flash games. I was preparing to become a 3D environmental artist, hoping to break into the game industry by designing a Half-Life 2 map. But I’ve always had the urge to explore different 2D art styles — I had a huge fascination with pixel art. During that time I would browse the Pixelation forum. The pixel art there was inspiring and I wanted to get in on it, but it was kind of hard with no direction. I just wanted to make some assets and learn the craft, not do all the characters and everything else. Shortly after that, I found a post recruiting people for The Mana World.
The Mana World is a free and open-source 2d MMORPG. It runs on the eAthena server, which is open-source software that emulates a Ragnarok Online server. I thought the game looked cool. It looked like Secret of Mana which was one of my favorite games growing up. It also reminded me of Ragnarok Online, which I didn’t play much but thought was super cool (I loved the art). So I jumped in.
Back when I first saw it, the game was super rough. Laggy. Buggy. But I loved being a part of it, the team was dedicated. It was exciting to log in everyday and see what changes were made while I was away. Most of the game development discussion was done in IRC chat rooms. There were many contributors. And good number of enthusiasts as well, which mostly played and gave feedback.
These are the tiles that I contributed to The Mana World.
I ended up dropping out of the project shortly after finishing these tiles. I had to devote more time to finishing school and my own projects. Looking back, it was my first experience working in a game development team that wasn’t just me and Ricky. I got some practice with working remotely with a team that was based in Europe. I got to feel the pressure of having to deliver game assets and the joy when everyone enjoyed what I contributed. It was also my first exposure to the concept of SVN — which saved me from feeling dumb when I first started using SVN at work.
I think it’s important to remember there’s always a game team out there that could use some help. People in school or just trying to break in the industry can look for these opportunities to gain some experience, and hopefully that leads to more confidence and some good portfolio pieces. From my experience on this project I knew that I could handle tiled pixel artwork. I wouldn’t revive this ability until 2007 on LUV Tank.
I participated in the Global Game Jam last year after Chris peer pressured me. The game jam is where you meet up with a bunch of friends and strangers and work to knock out a game in 48-hours. I enjoyed the spontaneously creative environment and the new faces I met. Our game last year, Triune Soldierwas something that wouldn’t have been made without the Game Jam so I wanted to see what would come out of it if I did it again.
This year, Chris wasn’t able to participate because he was caught up in moving into a new apartment. That was a bummer but my coworker Alex was joining in so I was planning to work with him and whoever else I met along the way. I showed up late again this year and wasn’t able to find my coworker. When I made it to the GamePipe Lab, I found my teammate from last year, Gabriel, and his team working out the game concept. I decided to jump right in.
The theme for this game jam was “Extinction” — like what happened to the dinosaurs. They were working out a concept involving a guy swatting mosquitos. The game was being created in Unity 3D. When I got there, Gabriel was pitching a sort of departure from the concept, trying to simplify the idea and abstract it to make it something more reasonably attainable in the short 48-hours.
The concept was less literal. Instead of mosquitos, the players were destroying these docile “white balls”. The personality of the balls was to be communicated by how they reacted and animated. Gabriel wanted to communicate the story through the movement and sound design similar to what’s exemplified in the Heider-Simmel demonstration or the classic Chuck Jones animation The Line and The Dot. This direction was majorly influenced by Gabirel having to pull an all-nighter last year to finish up the artwork and animations for Triune Soldier. I supported the direction to go abstract. We were working in 3d and didn’t have time to create, setup, and animate assets. And we were working in Unity, which none of us had created any finished games with before.
This new direction created a divide within the team. Our lead programmer was set on creating a literal concept. And even when explaining that the gameplay would remain unchanged, just the presentation would differ, he couldn’t agree to work on something with an abstract direction. The argument against the literal direction was basically scope related: we didn’t have assets, mosquitos would be hard to read visually in a 3d environment, there’s more expectations of what the player could do (jumping, collision with objects, environment, etc.) He insisted that wasn’t gonna be a problem but if there’s anything that I know to be true, everything in 3d takes way longer.
I strongly backed Gabriel’s idea because it was fully conceptualized. He drew up mockups of the style, rendered a short 3d Studio Max animation of gameplay, created a first pass at sound, and the story had a beginning and end. This was hard evidence for his concept. My support for the abstract direction was a bit of a surprise to Gabriel as I was adamantly opposed it last year (“I don’t want any abstract bullshit I wanna see some characters and a story!” haha ), but I was more open to it now that we were working in 3d and he already drew up mock-ups for the concept.
So anyway, shortly after I joined, I broke off into another team. We were wasting too much time arguing and we needed to move forward confidently. I booted up Unity and began setting up a scene for Gabriel’s concept.
I had mentioned briefly that none of us had completed a game in Unity before — Flash is my area of expertise. I’d done some tests and tutorials before and between the arguing I was giving our developers Jacob and Vishak a primer of what I knew about Unity. Basically how to setup a scene, link code to objects and instantiating objects. Jacob was set to do AI for the game, he’d done a lot of stuff in C++ and C# and was planning to implement some concepts he learned from an AI book. The split of our team didn’t affect him much because his AI code could be used for both projects, as the concepts were practically the same!
That was the first night. The next day, I came in with a basic demo of the game. There was a player with movement, enemy spawning, and some basic shaders applied to them for a graphic look. That morning we got an e-mail from Jacob saying that he wouldn’t be making it back but he sent the AI code he created. I spent an hour or two implementing the enemy code. Throughout the day I worked to get enemy targeting and destruction working. Vishak was handling UI and sound related things. One of the game jam organizers, Mihir, served as our tech-support and goto guy for Unity help as he was in the lab with us and he had finished some Unity projects before. That night Chris H. made it to the game jam and joined our team, offering a variety of abiltiies.
On the 2nd night, I punked out and went home early. I wasn’t intending to burn myself out over the game jam, because that sorta negates the benefits of it for me. Overnight Mihir joined the team officially and took over — working to implement all of the features that weren’t in there. A proximity based enemy targeting system, new modes of enemy behavior, sound and more. When I returned on Sunday, the game transformed a great deal.
On the final day, the rest of the team mostly polished bugs. Working out the enemy movement, sound effects, adding the title screen and whatnot. I pretty much just sat back and watched, and uploaded it when it was done. The result was great and it was great to see everyone pull it off and smile at the result.
I’m looking forward to Game Jamming again next year!
I’m releasing the source code for a Papervision3D game I was putting together. This project was meant to be an interactive visual for a party my friend threw last weekend, Friendly Integration. This game was meant to be projected onto a wall and controlled with a DDR pad for each player. There were also plans to have additional panels that could be stepped on that changed the “theme” of the game.


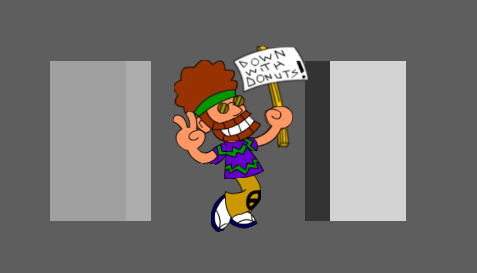 Demo made with LWF in Unity.


 This new direction created a divide within the team. Our lead programmer was set on creating a literal concept. And even when explaining that the gameplay would remain unchanged, just the presentation would differ, he couldn’t agree to work on something with an abstract direction. The argument against the literal direction was basically scope related: we didn’t have assets, mosquitos would be hard to read visually in a 3d environment, there’s more expectations of what the player could do (jumping, collision with objects, environment, etc.) He insisted that wasn’t gonna be a problem but if there’s anything that I know to be true, everything in 3d takes way longer.


 I’m releasing the source code for a Papervision3D game I was putting together. This project was meant to be an interactive visual for a party my friend threw last weekend,